- дом
- Сервосистема
- Solution of SD700 on Optical Inspection Equipment
Industry introduction
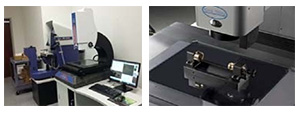
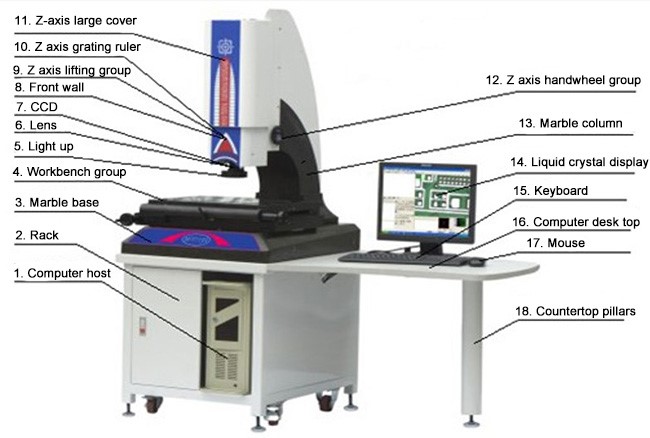
The MVP series image coordinate measuring instrument is a precise and efficient measuring instrument that integrates optics, precision machinery, electronics, and computers. It is a high-precision, high-efficiency video surveying and mapping system composed of a high-resolution CCD color camera, a continuous zoom objective lens, a computer, a precision optical ruler, a high-precision workbench, and measurement software. It is mainly based on two-dimensional measurement, and can also be used as a three-dimensional video measurement system, which can easily achieve the purposes of measurement, inspection, calibration, and reverse engineering. It is widely used in various industries. Such as electronic components, precision molds, knives, springs, conductive rubber, oil seal valves, camera parts, bicycle parts, auto parts, PCB processing, etc. It can also be used in teaching, scientific research, product development, and other fields.
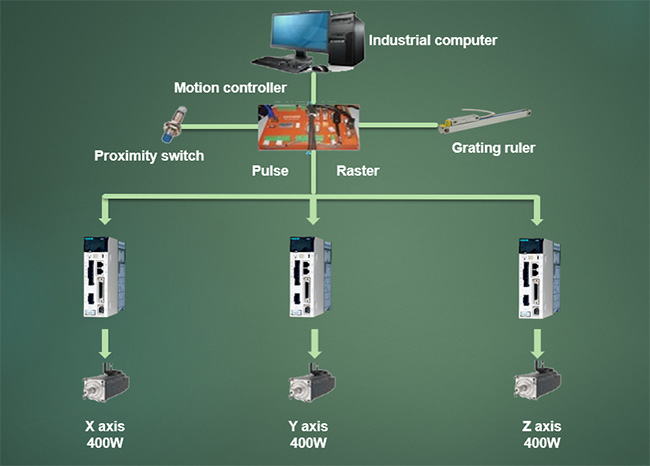
System topology
Program highlights
1. The unique current loop algorithm can effectively increase the bandwidth of the speed loop and greatly shorten the setting time. The setting time can be as fast as 1ms, which improves the measurement efficiency.
2. Adopt the fully closed loop application scheme to reduce the error caused by the gap of the mechanical transmission and improve the actual positioning accuracy of the control system.
3. Using the industry's high-level 23-bit absolute encoder, single-turn up to 8388608 pulses, communication speed up to 4Mpps. Realize more accurate positioning, low speed, and more stability.
4. Combining on-site technology and load conditions, select a dedicated servo motor to make the load operation more stable and accurate.
Process principle
The image coordinate measuring instrument is an image magnification measuring system that magnifies the workpiece to be measured on the display through continuous zoom objective lens, color CCD, and contour transmitted light or surface light illumination. Use professional measurement software to process the image data transmitted by the precision optical ruler and real-time images. The operator uses the mouse or keyboard to quickly stroke and mark measurements on the computer.
Technical index
The three-axis repeat positioning is within 3μ (0.003mm) (300mm/s).
Under the condition of ensuring a high response of the servo motor, the running noise of the servo motor is low.
If the grating ruler is broken, the Servo System will automatically protect it.
A fully closed-loop control system and semi-closed loop control system can be switched freely.
Application
 Global - English
 Spanish - Español
 French - Français
 Russian - Pусский язык
 Chinese - 中文
 Korean - 한국어
 Vietnamese - Tiếng Việt


 Оставить сообщение